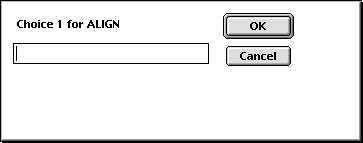
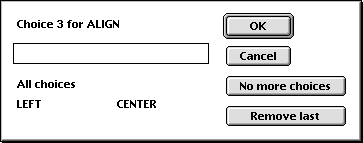
- 'OK' for each choice
- 'No more choices' after you have clicked OK for the last one.
- 'Remove last' to remove the last choice you just defined. You can remove them all one after another to correct a mistake somewhere.
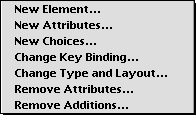
You can add new HTML elements, or new attributes to existing elements, to HTML mode. HTML is continuously evolving and many browsers have introduced their own extensions. Here you can add what is missing. New elements will be put in a new submenu 'Custom' of the HTML menu.
Your custom elements will always be available, regardless of the document type declaration in the document or the attribute preferences. It is assumed that you add new element because you want to use them... However, when validating the document all custom elements are considered as unknown.
New Element... - To add a new HTML element.
The elements are divided into three categories.
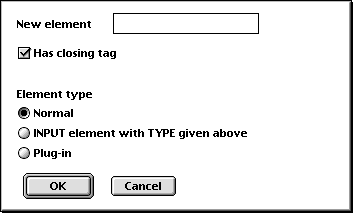
In the first dialog shown above you specify the following.
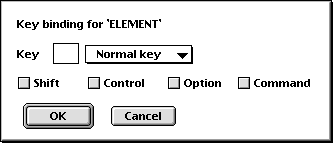
Then you are asked to give a key binding for the new element. Type one character in the text box or select a special key from the popup menu. Then select which of the modifiers shift, control, option and command you want. It is a bad idea to choose a key binding which conflicts with another one, but if it turns out that you have made a bad choice you can change it later. If you do not want any key binding, choose 'Normal key' in the popup menu and leave the text box blank.
Next you are asked to specify all the attributes to the element. (I would say that it is a good idea to write down the complete definition on a piece of paper before you start.)
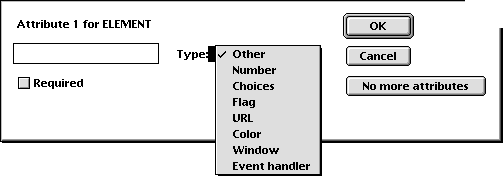
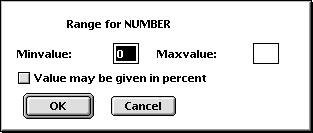
In the first dialog for each attribute (shown above) you specify:
The attributes you define will be displayed in the dialog window as you go along, as shown below.

Then click
The different types are


Once you have specified all attributes you will be presented with a final dialog box (one of the two below), where you are asked which layout you want in the html documents. (This layout only determines how the tags are inserted in the text document, and affects, of course, not how the text is displayed by the browser.)
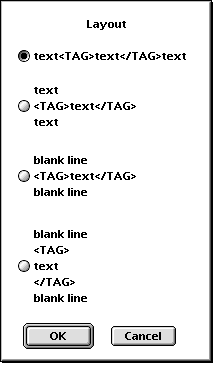
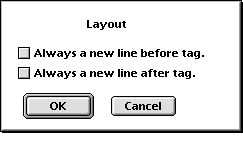
For elements without a closing tag you can specify if you always want a carriage return inserted before and/or after the tag.
For elements with a closing tag, you can choose between four different layouts, whether you want the tags to be on lines of their own and if you want blank lines before and after them.
The new element is now saved and after that, if you use the status bar to input attributes, you will be asked to select which optional attributes you want to be asked about.
New Attributes...
To add new
attributes to an existing HTML element. You are first presented with a
list from which you choose an element to add attributes to. In this list
'LI IN UL' and 'LI IN OL' are the LI element for UL and OL lists
respectively. 'INPUT TYPE=xxx' is the INPUT element with the type xxx.
LIVEAUDIO, LIVEVIDEO, QUICKTIME MOVIE, QUICKTIME VR and REALAUDIO are
different plug-ins. All the rest are the usual names of the elements.
Then you specify the attributes in the same way as you specify the
attributes to a new element as described above.
New Choices...
To add new choices to
an attribute with predefined choices. You are first presented with a list
from which you choose the element with the attribute to add to. Second,
you are presented with a list from which you select the attribute. Then
you specify new choices in the same way as described above.
Change Key Binding...
To change a key
binding for a custom element. Here you only change the key bindings for
the elements you have added yourself. Key bindings for other menu items are
changed using 'Key Bindings' in the HTML Utilities menu. You are presented
with a dialog box, as shown below, where you specify the key and which of
the modifiers shift, control, option and command you want. To remove the
key binding, either select '<No binding>' in the popup menu or select
'Normal key' and leave the text box blank.

Change Type and Layout...
To change
the layout of a custom element, to change whether it has a closing tag or
not, and to change its type (normal, input element or plugin).

Remove Attributes...
To remove one or
more of the attributes you have added to some element, or to remove choices
you have added to an attribute. You are first presented with a list of all
elements you have added attributes to. Select the element you want and you
are then presented with a list with all attributes you have added to this
element, where you can select the ones you want to remove. If you have
only added new choices to an attribute, only these choices are removed, not
the attribute itself.
There is no function to directly change an attribute. (This is something I hopefully will get around to add someday.) To change an attribute you have to first remove it and then add a new one again.
Remove Additions...
To remove an
element you have added or to remove additions you have made to a predefined
element. With this function you remove all additions you have made to an
element.